5.0 KiB
| title | slug | date | tags | |||
|---|---|---|---|---|---|---|
| OneDrive Sync for Linux (Ubuntu) | OneDrive-Sync-for-Linux-Ubuntu | 2018-02-22 00:01:00 |
|
So, a while back I decided to make the switch back to the Dark Side and moved all of my computers back to Windows 10 Pro from Ubuntu. My primary motivation for this was because I needed to use the Adobe Creative suite for project. After the project was completed, I just sort of stuck with Windows, largely out of complacency, but also because the Anniversary Update introduced a few really awesome features. The most useful of these was replacing the default Desktop/Documents/Pictures folders with OneDrive folders.
So, when I switched back to Ubuntu recently (mostly so I could use KDE Connect), I tried to find a OneDrive client that would do the same things. Unsurprisingly, no first-party client exists from our Microsoft overlords, and there is a stunning lack of third-party clients. However, thanks to a project called onedrive-d, I got it working. Here’s how.
(For the lazy among you, here’s an automatic script.)
Step 1: Install onedrived
onedrived is a third-party, CLI-based OneDrive client created by Xiangyu Bu. It provides basic OneDrive sync. Clean and simple.
Install git if you don’t have it:
sudo apt install git -y
Clone the onedrive-d files to a hidden folder:
git clone [https://github.com/xybu/onedrived-dev.git](https://github.com/xybu/onedrive-d-old.git) ~/.odd
cd ~/.odd
Run the Installer:
sudo python3 ./setup.py install
Step 2: Install ngrok
ngrok is a 3rd-party platform for relaying webhook integration. onedrived uses ngrok to allow webhook requests from the OneDrive API to the onedrived client without requiring port-forwarding or similar.
Download ngrok from here and extract the ngrok file. Then, copy it to a path directory using the following command:
sudo mv ~/path/to/extracted/ngrok /usr/bin/ngrok
Step 3: Configure onedrived
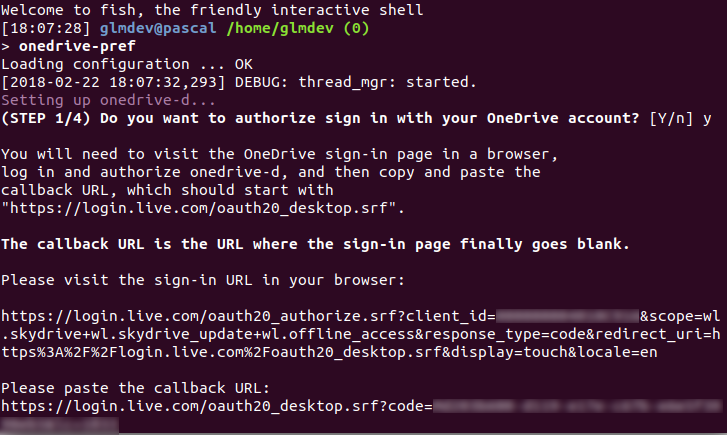
After installing onedrived, you need to authorize it to access your Microsoft account. To do this, run the following command to configure onedrived interactively:
onedrived-pref account add
This command will launch an interactive wizard to help you configure onedrived. First, copy the given URL into your browser of choice and complete the Microsoft login and permissions. After you allow onedrived access, it will land you on a blank white page. Copy the URL of this page, paste it back into the interactive prompt.
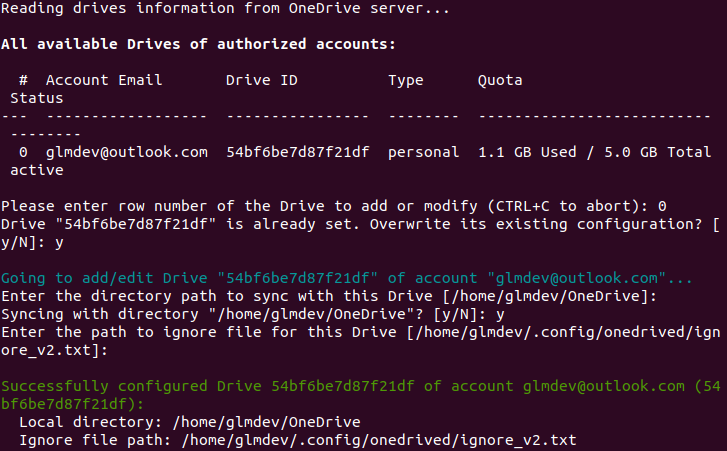
Now, you need to select which virtual drive to use with onedrived. Set the virtual drive by running the following command:
onedrived-pref drive set
It will run you through some interactive setup questions. Leave the default directory path the same, tell it y to sync that directory, and leave the default ignore file.
Lastly, you can start the OneDrive daemon by running:
onedrived start
At this point, onedrived will begin syncing your OneDrive files with the local computer. This may take some time if you have a particularly large OneDrive. You can access the files by navigating to Home > OneDrive.
This, however, isn’t as seamless as Microsoft’s implementation. For that, we need to change the default folders that Nautilus uses. To do this, open the user’s directory configuration file using the following command:
gedit ~/.config/user-dirs.dirs
The user-dirs.dirs file tells GNOME/Nautilus which folders to use for the default Desktop/Documents/Pictures/etc. folders. Change the default paths to their respective OneDrive folders (make sure you’ve created the folders on your OneDrive) like so:
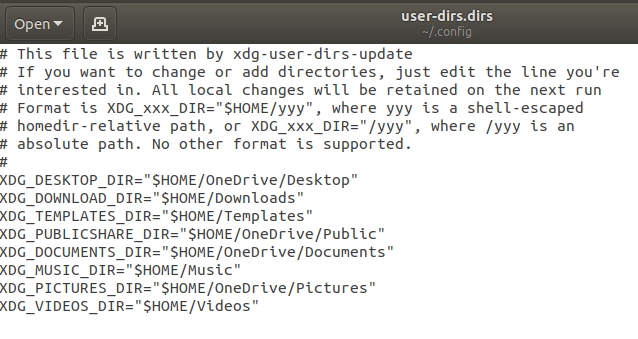 You can pick which folders you want to sync over OneDrive and which ones you want to use locally. In this case, I’ve chosen to sync my Desktop, Public, Documents, and Pictures folders.
Finally, run the following command to ensure your changes are preserved:
echo "enabled=false" > ~/.config/user-dirs.conf
Step 3: Enable the OneDrive Daemon on Login
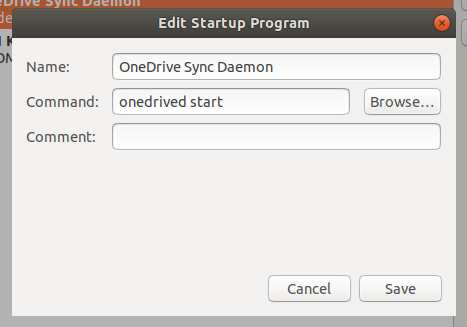
The onedrive-d daemon doesn’t automatically start by itself, so to ensure that OneDrive starts syncing automatically when you log in, we need to tell GNOME to start it on login. Run the gnome-session-properties command to open GNOME’s configuration. Then, add a startup program to run the onedrived start command.
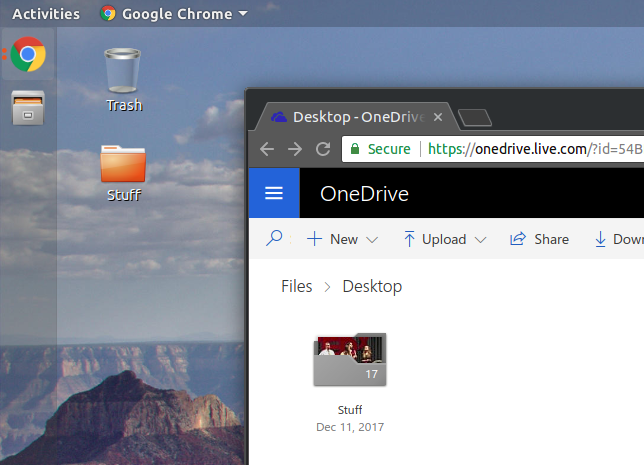
Finally, log out and log back in to restart Nautilus and from now on, GNOME and Nautilus should seamlessly sync with your OneDrive.
